Mr. Rooter Plumbing explains how to repair a shower diverter to restore proper water flow.
|
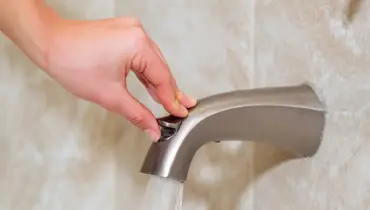
How to Repair a Shower Diverter
A shower diverter is a small pin or switch in your bathroom that connects your bathtub faucet to your shower head. When the diverter is activated, water is redirected toward the shower head. When it’s not activated, it flows out of your faucet for those relaxing, hot baths.
Nearly every bathtub and shower combo has a shower diverter, and they mostly work at their best. However, there may come a time when your shower diverter stops working, and you must consider shower diverter repair.
Knowledge is power. The more you know about why shower diverters stop working and how you can fix them, the more confidence you may have to take action and have it repaired without delay.
Why Has My Shower Diverter Stopped Working?
Before you learn how to repair a shower diverter or which shower diverter repair kit to buy, it doesn’t hurt to understand why shower diverters stop working in the first place. These are some of the most common reasons:
Old Age
Even the highest quality shower diverters don’t last forever. You may need to consider shower diverter valve repair or replacement if worn-out components have stopped it from working at its best – or at all.
Replacement is generally the best option for shower diverters that have failed due to wear and old age. Your local, trusted plumbing company can help with this task.
Mineral Buildup
If you live somewhere with hard water, it’s not uncommon for fixtures, faucets, and showers to experience related issues. Mineral buildup can ‘gum up’ the internal components, making your shower diverter no longer work. Fortunately, mineral buildup can sometimes be an easy fix:
- Open up the diverter
- Use a cleaning agent or distilled white vinegar to get rid of the buildup
- Reinstall the diverter
Are you tired of mineral buildup being an ongoing problem? Talk to your local plumbing company about installing a water softener or filtered shower head.
Corrosion
Corrosion can happen when your shower diverter element starts to rust. Unfortunately, learning how to repair the shower diverter valve won’t make a difference. Once rust and corrosion set in, your shower diverter can break or become stuck in place. In most situations, having trusted service professionals replace the shower diverter is your best option.
Step-by-Step Guide to Replace a Shower Diverter
You might know how to repair tub shower diverter parts, but that doesn’t mean your diverter is suitable for repairs. Replacement is sometimes the better option. Competent DIYers may be able to undertake this task themselves. However, you may feel more comfortable calling a service professional, like a local plumber.
Follow this seven-step guide to replace your broken shower diverter:
1. Locate the shower shut-off valve to turn off the water. It may be behind an access panel near your shower or in your basement.
2. Cover or seal your drain with tape. You don’t want small hardware falling down the drain!
3. Tighten the screws behind the faceplate of the diverter valve. This is a common fix in many ‘how to repair the shower faucet diverter’ guides. If water continues to leak from the bathtub spout, move on to step 4.
4. Disassemble your shower diverter. If it has a rotating valve, unscrew the nut at its stem to remove the entire valve. If it has a gate-type valve, you can unscrew the threaded tub spout.
5. Buy a new diverter. Visit a plumbing supply store with your old diverter to ensure a suitable match.
6. Install your new diverter. Insert all threaded screws and parts straight on and use a wrench to tighten the diverter. Note: Don’t over-tighten it! Adjust the stopper or twist the gate to make sure it’s in the correct position.
7. Turn on your water supply. Set the shower diverter and direct the water flow to your shower head. Is your shower flowing well without any leaks? You have successfully replaced your broken shower diverter!
Did your replacement efforts not work? You may have a more severe problem. Put down your tub faucet shower diverter repair guide and contact an expert plumber for help.
Top tip: Always release the diverter to let water flow from your tub faucet for a few seconds before turning off the water. This simple action may reduce wear and strain on your shower diverter.
Contact Mr. Rooter Plumbing for Shower Diverter Repair and Replacement
If you don’t want to tackle DIY shower repairs or need professional help, contact Mr. Rooter Plumbing without delay. Our licensed and insured serviced professionals can provide expert plumbing repair and exceptional customer service.
Call Mr. Rooter Plumbing today or request an estimate online. Whether you require single-handle shower diverter valve repair or full diverter replacement, we’re here to help.

