Quick Answer: Your well pump may need replacing if you notice no water flow, low or fluctuating water pressure, sputtering or muddy water, constantly running pump, sudden spikes in your electric bill, or strange noises from the pump. Submersible well pumps typically last 10–15 years; above-ground jet pumps last about 10 years.
Top signs of a failing well pump:
- No water from faucets
- Low or inconsistent water pressure
- Sputtering, muddy, or off-tasting water
- Pump runs constantly or short-cycles
- Higher than normal electric bill
Table of Contents
- What to Do If Your Water Stops Flowing
- Well Pump Troubleshooting
- Factors That Affect the Life of Your Water Tank
- Well Water Maintenance and Checks You Can Do Yourself
- How Your Water Pump and Pressure Tank Work Together
- How Water Pressure Tanks Work
Having your own well gives you a few advantages over using the municipal water supply. Specifically, having one can lower the monthly costs of having fresh clean water easily accessible in your home. But it does require more technology to maintain and repair if you want to keep that dependable supply running through your faucets.
From major issues like a low-yielding well to the more common problems that can occur with the pressure tank, switches, and pumps, there are plenty of things you need to know about your well water system.
How to tell if your well pump is going bad:
- No water flow from faucets
- Poor water pressure
- Constantly running pump
Now that you know the signs, Mr. Rooter Plumbing has compiled a comprehensive guide to troubleshooting and repairing the problem or knowing when it is time to call in reinforcements.
Need more information or assistance? Call the professionals at Mr. Rooter Plumbing!
What to Do If Your Water Stops Flowing
Chances are you’ll need to call in a plumber to make a thorough check, but there are a few simple checks you can do to determine if a minor problem is stopping your water supply.
Some people immediately think their well pump has stopped working, but with all the different components that bring well water into your home, how do you know if your well pump is broken? Let’s go over some of the other issues you should also focus on before you assume the worst.
There are three possibilities that could be stopping your water:
- Well failure (low supply of water in the ground)
- Equipment failure (of the well water equipment or from a power failure affecting the equipment)
- Plumbing breakdown (clogged or broken pipes)
When you discover you don’t have any water, the first thing to check is your electrical panel. See if the circuit for your well pump and pressure tank is in the “on” position. If not, flip it to “on” and see if that gets your system running. If this seemed to solve your problem, it could have been a one-time glitch, and you may not have any other issues for the time being. But if the breaker goes out again, call in a professional to diagnose the problem, as they will know how to tell if your well pump is bad.
If that doesn’t solve the problem, the next place to check is your pressure tank. Look at the pressure gauge and see if it’s showing a reading above 20 psi. Depending on the type of pressure tank, it could be an indication of a higher psi, but if your tank is showing pressure, then your problem is likely within your house and not a problem with the well pump or well.
No pressure? Then your problem is the well pump, well, pressure tank, or switch. Call a service provider with the information you’ve discovered so far and have a professional diagnose the problem.

If one of your lines has broken, you may notice flooding in the section of your property where the pipes go from the well to the house. This will overwork your well pump, which can increase your water and electricity bills. When you notice flooding, call a plumber immediately. This can lead to serious water damage and costly repair bills if not handled quickly.
If you’re inclined to do some DIY repair and your inspection has shown you could have a problem with the pressure tank or switch, follow the instructions in the section below on pressure switch maintenance and replacement.
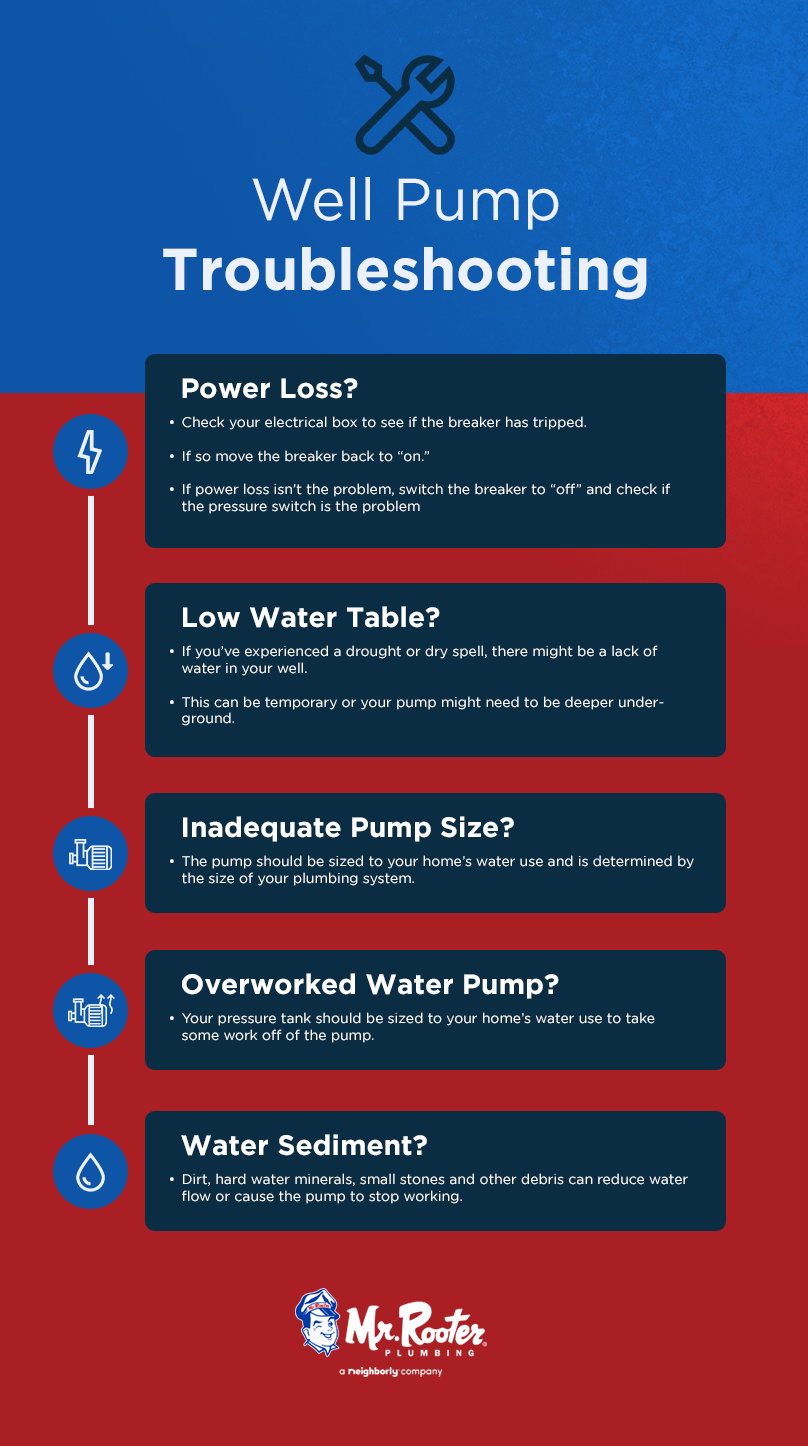
Well Pump Troubleshooting
You may be reading this article to become better informed about well systems or because you’re dealing with a real problem with your home’s water supply. Whatever your reason for visiting, we’ll provide you with some things to look out for and possible problems you may encounter.
While a bad water pump can be the source of a water problem in your home, there could also be issues with other components of your well water technology that could be the culprit. Here are some of the problems that can affect your well or well pump. We’ll also look at other problems that could be causing issues with your water supply.
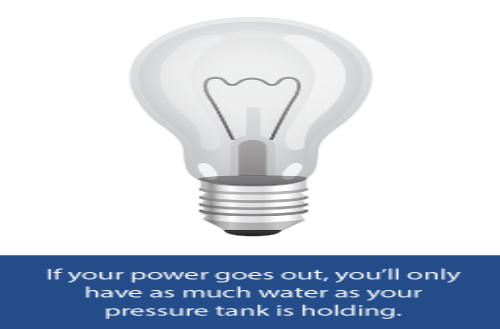
- Power Loss – If your power goes out, you’ll only have as much water as your pressure tank is holding since electricity is needed to run the pressure switch on your tank and the pump. However, even if you aren’t experiencing a complete power outage, you may have just blown the breaker for the pump. Check your electrical box to see if the breaker has been tripped. If it has, move the breaker back to “on.” If the problem doesn’t seem the be power loss, then switch the breaker to “off” again to prevent further damage and either check out our DIY tips below to see if the pressure switch is your problem or call a local professional.
- Low Water Table – If your area is suffering from drought or in the middle of a long dry spell, there may be a lack of water in your well. The main signs of this are sputtering or spitting water from the tap, muddy and murky water, or a noticeably off taste to your water. It could just be temporary, or your pump may need to be deeper underground to draw from the water table.
- Inadequate Pump Size – A water pump should be sized for your home’s water use. The size of a pump is determined by the size of your plumbing system. Factors like how many faucets there are and how many appliances use water will affect the size of your pump. If your pump is too small, it may not be able to send enough water to your home.
- Overworked Water Pump – Your pressure tank should also be sized to your home’s water use to take some of the work off the water pump. A pump that is called on to pump water just a few times a day will work significantly longer than a pump that cycles on and off several times a day.
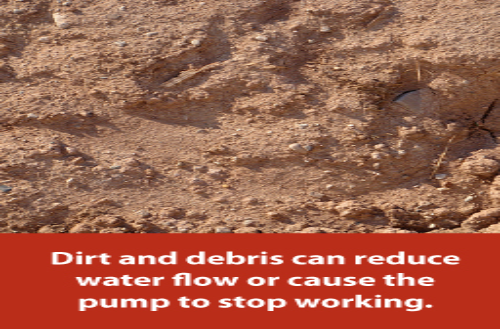
- Water Sediment – The sediment in the water can cause major wear to the pump assembly by acting as an abrasive that slowly damages the pump’s bearings and other components. Dirt, hard water minerals, small stones, or other debris can also clog the pipes leading to your pump and reduce water flow or cause the pump to stop working completely.
It can be hard to know if your well pump is broken or if another part of your water system is not working properly. The most common repairs to well water systems are replacing the pressure tank and/or the pressure switch. Both of which cost much less than the bill for a water pump replacement.
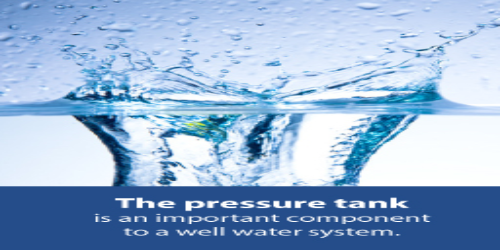
Factors That Affect the Life of Your Water Tank
Your water pressure tank is a vital part of your water well system and will greatly affect the health of your well pump. Here are some factors that can affect the life of your tank:
- Water Tank Material – Unlined steel tanks corrode quickly, especially if they are in a damp environment like a basement. Internal bladder-type water tanks are the best choice, as they hold the water separate from the air in the bladder of the tank.
- Installation – With a number of variables that come into play when installing a pressure tank, there are a few different mistakes that will drastically shorten the life of your tank, like connecting galvanized iron fittings to copper fittings. This is why it’s always recommended to hire an experienced plumber to install your water tank.
- State of the Water – Depending on the chemical makeup of your water supply, the water itself could be quite corrosive to all the components of your well water system.
- Frequency of Maintenance and Inspections – Ignoring your pressure tank and not even doing a simple check for minor leaks and proper operation will likely lead to expensive repairs or an unnecessary early replacement of your tank.
Well Water Maintenance and Checks You Can Do Yourself
If you’re the type of person that likes to do your own home maintenance and repairs, this section is for you. For those of you that don’t have the desire or mechanical aptitude to do some general home repairs, give us a call for even the smallest of concerns or for a routine maintenance checkup.
Take a bit of time to check the health of your well pump and all the parts that get that water from the ground to your house. You’ll likely save yourself from making unnecessary repairs and replacements when you notice elements that aren’t working their best or issues that could become a major expense.
Here are some of the more common pressure tank issues homeowners run into that you can easily fix yourself. We’ll also tell you about some of the more complicated problems that will require a plumber.
Pressure Switch Maintenance
The pressure switch located near the bottom of your pressure tank requires periodic maintenance and is the most common culprit of problems with pumping your well water. Troubleshooting your well water problems is best started with the pressure switch.
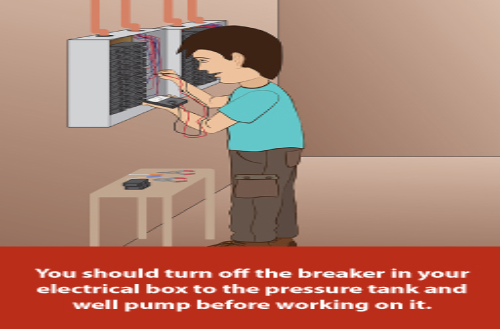
As with anything in your home that has power running through it, you should turn off the breaker in your electrical box to the pressure tank and well pump before working on it. It could be set up as one large breaker of 30+ amps or a double circuit breaker with two lower amperages in tandem on the panelboard. The pressure tank and well pump should be wired on the same breaker, so if you find a label for “well” or “water pump,” that should be the power shut-off for the pressure tank, too.
Once you’re sure the power is off to the pressure tank — you can test with a non-contact voltage tester —follow these steps to perform basic maintenance on your pressure switch:
- Take the plastic or metal cover off the pressure switch — there may be a couple of screws to remove.
- If your pump is not operating at all, move the switch relay contacts apart from each other and check to see if there is any pitting or burning on the contacts. Deep pitting and noticeable damage from burning will likely require that the whole pressure switch be replaced. If there is no major damage, clean the contacts with a fine-grit emery cloth or sandpaper until you have revealed the shiny metal on all contacts — there are usually eight: four contacts with contact points on each side.
- Locate the pressure adjustment nut, which should be in front of the compartment where the switch relay contacts are situated. Using a wrench, adjust the nut according to the manufacturer’s instructions, which are usually printed on the inside of the switch cover.
This is a great maintenance task to do on a bi-annual basis. It’s especially important if your pressure pump is in a high-humidity area like the basement. If you were trying to get your water supply back to your house with the pressure switch maintenance and it didn’t seem to do the trick, you may need a new pressure switch.
Pressure Switch Replacement
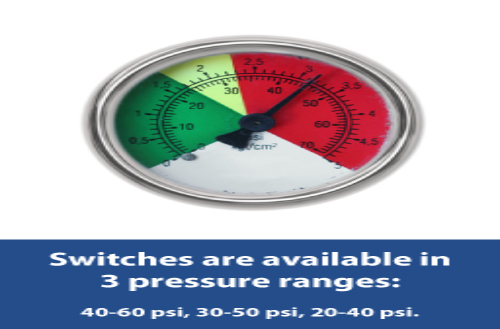
Switches are available in three different pressure ranges: 40 to 60 psi, 30 to 50 psi, and 20 to 40 psi. Your pressure tank was designed to work properly with only one of these ranges, so be sure to check which range is right for your tank. You can usually find this information printed on the inside of the switch cover.
Here are the step-by-step directions to replace your pressure switch:
- Turn off the power to the pressure tank as described above.
- Label each of the wires coming out of the switch relay and remove them from the faulty switch.
- Close off the valve that goes from the pressure tank to the plumbing of your house.
- Drain all the water out of the tank.
- Remove the old switch and the pressure gauge. A new gauge is about $10 and is easy to replace when you’re already changing the pressure switch to prevent future issues.
- Wrap the pipe threads with Teflon tape and install the new pressure switch and pressure gauge.
- Connect the wiring to the new switch in the same order as you removed them and secure the switch cover.
- Turn the power to the tank back on.
If neither of these quick fixes gets your system running again, you might have an issue with your pressure tank or water pump. A tank or pump failure can be caused by a number of factors: age, low-quality components, running without water, constant cycling, or a clogged intake valve. Water pumps and pressure tanks don’t need much in the way of maintenance, but they do need the right environment to reach their maximum life expectancy.
Even the most seasoned do-it-yourselfer should back off from water pump replacement or pressure tank issues. A submersible pump needs to be pulled up a long way from your well, and once it’s up, you may not be too sure what you’re going to do with it. Someone trained in water pump technology will be able to make a repair or recognize the time has come for a replacement. Even above-ground jet pumps contain a number of components that aren’t easy to troubleshoot without training and experience.
How Your Water Pump and Pressure Tank Work Together
Water pressure is the factor that can make or break a satisfying shower, give you the power to suds up your dishwater, or rinse off your soapy hands. For municipal water supply, the water pressure is mainly controlled by the city or township, although there are a few internal plumbing issues that can decrease pressure. When you have a well for your home’s water supply, your pressure tank will dictate the water pressure in your pipes.
Your well, water pump, and pressure tank work together to move water from the water table into your home. The well pump pulls or pushes — depending on the type of pump — the water from the well. It then sends it to the pressure tank, which holds the water under pressure until something in your plumbing system is turned on. The pressure tank creates pressure with a portion of its tank filled with compressed air.
When a water valve is opened within your home’s plumbing, the tank pushes out the water through the piping and then only fills up again when the pressure in the tank falls below a specific pressure rating. By having the pressure tank hold a significant amount of water, there is less wear and tear on the well pump because it doesn’t have to cycle on and off as often. Since well pumps are a bit more work to repair and replace, the pressure tank, specifically the right size of pressure tank, is an important component of a well water system.
How Water Pressure Tanks Work
Once the water is in the pressure tank, how does it know when to get more? That’s where the pressure switch comes into play. When the tank pushes out enough water to trigger the pressure switch, it then allows more water in from the well pump. The tank is then refilled to its maximum capacity, which is measured by the pressure gauge on the tank, and then it shuts off again. The pressure switches are set to a 20-psi range of the starting and stopping pressures. So, if a pressure switch is set for 40 to 60 psi when enough water is drained from the tank to reduce pressure to 40 psi, the pressure tank will turn on to collect water from the well through the water pump and turn off when the pressure in the tank reaches 60 psi.
Having the correct size of pressure tank for your house helps ensure a long life for your water pump and pressure tank. Most manufacturers provide a handy chart to size the right tank for your home, but getting a new pressure tank is one of those installations that’s best left to a professional who will know just the right tank for your home and ensure everything is connected properly.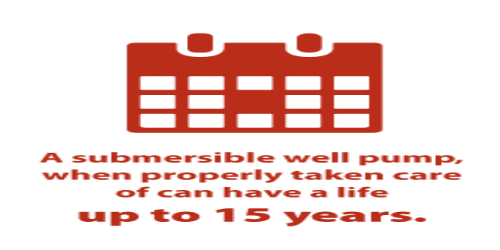
Submersible pup life Span More About Well Pumps
The type of water pump you have for your well is either a jet pump or a submersible pump. Jet pumps can be shallow or deep well pumps with the ability to pull up the water from 25 feet or 100 feet. Submersible pumps are installed deep inside your well and can push the water out of the well from hundreds of feet.
When properly cared for, a submersible well pump can have a long life of up to 15 years, although it can be difficult to know just how old your well pump is if a previous homeowner had it installed. Above-ground jet pumps, more commonly used with shallow wells have an average life span of 10 years.
Be Protected With an Annual Water Well Inspection
Getting an annual water well inspection done may seem like an unnecessary expense when you don’t currently have a problem. If the $100-$150 expense doesn’t seem justified when your water is flowing just fine, think of the time you are saving from troubleshooting well pump problems. You may also consider that locating a well pump problem before it becomes an issue can save you more than $700.
Having a plumber look over all your well systems and lines alerts you to any potential problems and provides you with insights and recommendations from someone trained to maintain a quality water system. A regular inspection from a professional is your time to ask questions, get insights, hear some first-hand knowledge and get the peace of mind of knowing you’ve taken steps to care for your home.
From time to time, well pump repair or replacement will be necessary. With the right knowledge, you can do your best to prolong the life of your well water technology and keep it in good working order — and even do some minor fixes yourself. For those problems that need the skills of a professional, call Mr. Rooter Plumbing of Greater Syracuse for any installations, repairs, or inspections of your plumbing and well systems.

