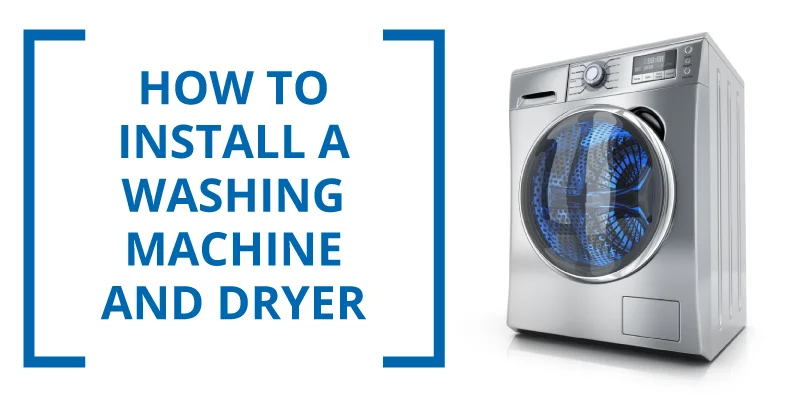
There are few situations more intimidating than finding yourself facing a large appliance or piece of equipment that needs to be installed. Of course, there are directions, but they often contain unfamiliar technical terms that might as well be in another language. Especially when it comes to something as large and unwieldy as a washing machine or dryer, you are often left scratching your head and wondering how in the world everyone else does it.
There are plenty of reasons you might find yourself in this situation. Maybe you're just moving to a new place. Maybe your old machine broke or was outdated. Maybe you're apartment or house never had laundry facilities and you decided it was time that changed.
Since installing a washing machine and dryer involves your water and electrical or gas systems, it's imperative that your appliances are installed correctly the first time to avoid damage to your new appliances or your home.
For simpler installations, like those where you already have all of the hookups you need for the new equipment available, you may be able to handle the installation of your new washer and dryer yourself. For more complicated installations, where you may need to add new plumbing hookups, ventilation systems, or electrical outlets, you will likely want to call a professional.
Regardless of how you handle the installation, understanding the process and utility requirements can better help you plan the installation of your new washer and dryer.
How to Install a New Washing Machine
Before beginning the installation process, you should ensure that you'll have access to these fundamental things.
-
Electricity
The type of outlet needed may depend on the specifications of the washing machine. Generally speaking, you should have a 120-volt outlet with ground fault protection. This helps provide an extra layer of security against faults and other electrical interruptions and problems.
-
Water Supply
Ideally, your washing machine will be installed close to your water heater so you can tap into the outlet and inlet lines for your cold and hot water supply. If this isn't possible, use the closest ¾ inch main cold and hotlines and run these lines along the wall behind the machine. Each line will end in a shutoff valve that is attached to the wall framing above the washing machine for ease of access.
-
Drainage
When a machine uses as much water as a washing machine does, it needs a place to drain this water. A washing machine drain is called a standpipe, and it empties into what's called a P-trap. This then directs the water into a waste line. Commonly, washing machines will even share drains with sinks or toilets.
Many washing machines run off of a standard 120V electrical outlet, and if you already have a washing machine outlet box that should have all the water supply and drainage requirements covered. With these three items, as well as the washing machine itself, the installation process can get underway.
1. Prepare the Area
Before you begin installing, you should always check to be sure there's enough room for the washer. Measure the width and length of the machine against the space you expect to install it to ensure the two sets of measurements match. Also, make sure you're close enough to the outlets and lines that you plan to connect to your new washer.
During this stage, you should also check the floor. Washers and dryers should sit on a sturdy, level floor. If you place them on carpet or a weak tiling, they may cause damage to the flooring.
2. Read the Instruction
It’s also a good idea to read through the instructions. They may be dense, and they may be difficult to understand, but it's the only way to learn if your washing machine model has any unusual specifications that need attention during the installation process.
3. Clean the Faucets
Before you begin installing, run some water through the faucets, using a bucket or tub to catch the water. Make sure you use both the cold and hot water settings. This helps ensure that any debris gets flushed out ahead of time and isn't hanging around to clog up your new washer.
After you've finished this step, shut the water off. This entails more than just shutting off the faucets. It means turning off the entire water supply for the duration of the installation process. This is a critical step, as you don't want the water to turn on by mistake while you're in the middle of installing  your new appliance.
4. Move the Machine into Place
This step may require more than one person. Slide the machine almost all the way into place against the wall. Remember to leave yourself room to get behind it to hook up the necessary pipes and wires. You can push it the rest of the way into place later, once everything is connected.
5. Connect the Water Supply Hoses to Their Respective Faucets
Next, connect your two water supply hoses to the correct faucets. The hot water faucet connects to the hot water hose, and the cold water faucet connects to the cold water hose.
In many cases, the hoses will be color-coded to help you better distinguish between the two. Red will be hot and blue will be cold. These colors will help you when installing the washer hoses. If your tubes are not color-coded, it's up to you to remember which one had which label on it. If there is no label at all, look in the instructions.
When connecting the hose to the faucet, use the correct end. The end with the filter screen inside the coupling is the end that attaches to the faucet.
Once you have the hoses loosely connected to the faucets, it's time to tighten them. Do this by turning the couplings by hand in a clockwise direction until they become snug. Use a pair of pliers to turn each hose coupling one more quarter turn. Test them with your hands to see if you could accidentally unscrew them. They should feel secure, but shouldn't be overly tight. After all, you want to be able to disconnect them eventually. Overtightening may also lead to leaks in the future.
6. Connect the Water Supply Hoses to the Back of the Washer
 Now that your water supply hoses are connected to their matching faucets, it's time to attach them to the back of your washer. Again, in this step, the important thing is to connect the right hose to the right inlet on the back of the washing machine.
The end you should be attaching in this step is the end with the plain rubber washers. If for some reason your hoses do not have washers, you may want to consider attaching some before connecting the hoses. Otherwise, they will be prone to leaking.
Tighten the coupling exactly as before. Turn clockwise with your hands until you can't make them any tighter, then add one more quarter turn with a pair of pliers or a wrench.
7. Check for Leaks
This step is simple. Turn your water supply back on and open the taps. Check that the water is running smoothly and isn’t leaking at either of your connection points. If all is as it should be, it’s safe to move on to the next step.
8. Connect the Drain Hose to the Washing Machine
 In some washing machine models, the drain hose comes pre-connected. If that is the case, just skip this step and move on.
If your washing machine model does not come pre-connected, it screws into place on the water outlet in much the same way as the water supply hoses. Use a screwdriver to secure it firmly into place.
9. Feed the Drain Hose into the Drain Receptacle
This step may differ slightly depending on your plumbing situation. You may need to run this hose into a drain in the wall, the floor, or even into a laundry sink. You may need to customize these instructions slightly to fit your set-up. If you are using a standard washing machine hookup box, there is likely a spot for you to hook or attach a typical drain hose end. This is often U-shaped and will hook right over the side of the outlet box. Use the various tools that came with your washer, which might include straps and hooks, to help you secure the drain pipe into place. Check your instruction manual for directions on how to use these elements properly based on your washer’s specific requirements.No matter what your drainage set-up looks like, always leave a few inches between the end of the hose and the bottom of the drain or sink you're using. By doing this, you prevent the machine from mistakenly siphoning discarded water back up the drainage pipe and into the washer again.
10. Plug It In
This step is simple. Plug the washer's power cord into the nearby outlet you've chosen. With this done, you're all set to push your machine into place against the wall.
How to Install a New Dryer
Before you can begin the installation process, it’s important to make sure you have these things:
-
An Exhaust Vent
Dryers use an enormous amount of hot air to dry wet clothing. All this air needs to go somewhere. That’s what the exhaust vent is for. Most vents exit either through the wall or the roof of the house, depending on what’s closer and more convenient. Cut a hole for this vent and seal up the gaps after the vent is in place. Use a smooth metal duct pipe for your vent, and follow the specifications in the instructions regarding length.
-
A Power Source
Your requirements for a power source will depend on what type of dryer you have. Some dryers are electric, and others are gas-powered. If you have an electric dryer, you'll need a 240-volt outlet nearby. This outlet should be controlled by a set of 30- to 50-amp breakers. Examine your dryer specifications to be sure. If you have a gas dryer, you'll need to install a gas line. This task can be dangerous, so it's imperative that you let the professionals handle any gas line installations.
Once these things are set up and in place, you can move on to the actual business of installing your new dryer.
1. Prepare Your Space
This step is the same as it is for the washer. Make sure you have the space necessary to fit your new machine. Measure the space you have allotted for your dryer and measure the dryer to be sure these two measurements match. Remember that the dryer can't be pushed directly against the wall. It will need at least four inches between it and the wall to allow for adequate venting. Make sure the floor is stable, and you aren't installing your machine on carpet or weak tiling that might get damaged.
2. Read the Instructions
Instructions aren't always easy to read or understand, but it's essential to read through them, even if only to skim for important notices. This way, you'll be aware of any unusual specifications or modifications you'll need to make for your dryer.
3. Clean the Dryer Vent
This is an essential step unless the house is brand new or has never had a dryer. If you're replacing an older dryer, after you remove it, clean the vent of any debris or dirt. A blocked vent is not only dirty, but it can also be a fire hazard. You can use a dryer vent brush, a shop vac, or a combination of the two to help clean out the vent from inside your home. Once the inside portion of the vent is clean, head outside to clean the other end of the vent. Remove the outside vent hood and clean out any dirt and debris that has been collected in it. Although installing a new dryer is an ideal time to clean your dryer vent, there's no need to wait that long. Dryer vents should be cleaned every two years to ensure maximum lifespan, safety, and cleanliness.
4. Push the Dryer into Place
With the vent cleaned out, it’s now time to move the dryer almost all the way into place. Push it towards the wall where it will be installed, leaving just enough space for you to work behind it.
5. Attach the Vent Hose to Your Machine
The vent hose should fit neatly over the vent hole on the back of the dryer. The process for connecting this piece will be slightly different depending on what material yours is made of. Ideally, it will be a metal vent duct material. Other types include ribbed plastic or aluminum, but these options tend to collect dirt and lint in the ribs. If you are using a metal duct, this should fit smoothly over the vent hole, with no need for any tape or clamps unless specified in the instructions. If your dryer comes equipped with a plastic vent hose or you decide to use one for other reasons, use a circular dryer clamp over the end of the hose where it connects to the dryer. This will help hold it in place and keep it from slipping off. Your dryer may even come with clamps for this exact purpose.
6. Attach the Vent Hose to the Wall Vent
Now that one end of your duct or hose is attached to the dryer, the other end needs to connect to the wall. If you're using a metal hose, it should just slide neatly into place with no clamps or tape required. If, however, you're using a more flexible tube, use another circular clamp to hold this end securely in place.
7. Plug It In
 If your new dryer runs off of electricity you will most likely need a 240V outlet. If your space already has an outlet that meets this requirement, go ahead and plug your new dryer in. If not, you will want to have an electrician install a 240V outlet for you.
If you are using gas to power your dryer it is a good idea to have a professional hook this up for you unless you have experience working with gas lines. All gas should be shut off before you attempt to switch gas lines to a new dryer. Does everything seem to be working correctly? If so, go ahead and push it back into its final position, remembering to leave a few inches of venting space between it and the wall.
What to Do if the House Has Never Had a Washer and Dryer in It?
Of course, all these instructions assume that your house or apartment will already have the necessary hookups for a washer and dryer. And nine times out of ten, that will be the case. But what if you're installing a washing machine and dryer in a house or apartment that has never had them before? What if there are no existing hookups?
If this is your situation, there's no need to worry. The installation process becomes slightly more complicated, but still doable. You will likely want to call a professional to handle this process unless you have previous experience.
How to Install Washer Hookups
A washing machine outlet box contains all the necessary hookups to run a washing machine. It also hides the faucets, tubes and outlets to give your entire washing machine and dryer setup a cleaner and less cluttered feeling. Installing this washer hookup is still a job best left to professionals, but this is a basic overview of the necessary steps.
1. Find the Right Location
Installing a washing machine outlet box begins by finding a suitable location. You need to place the outlet box between two studs on the wall behind or near the washing machine. If your walls are unfinished, your job is easy. If the walls are already finished, use a stud finder to locate the studs and then mark the appropriate location with a pencil. In addition to placing the box between the studs, you should also put it anywhere from 42 to 48 inches above the floor, so it's in an easily accessible spot above your machine. Think about convenience when you choose where to place this box. Ideally, it will be conveniently out of the  way, yet easy to reach when you need to access the faucets. You might also consider aesthetic appeal. Where will this box look most attractive or innocuous?
2. Prepare the Location
Measure the box and carefully cut this shape into the drywall where you have decided to install your outlet box. As you cut, add an extra 12 inches to the shape being cut in the same direction of the water lines.
3. Place the Outlet Box
First, remove the outer trim from the outlet box. Carefully position the box on the wall chosen wall, so the nailing fins fit directly over the studs on either side of the hole you cut. The box itself should fit snugly into the hole between the studs. For the perfect fit, the outside edges of the box should be neatly flush against the surface of the drywall. To fasten the box in place, nail it to the studs with 8d nails or whatever is specified by the instructions. If the outlet box kit came with a strap bracket, nail it between the studs for an extra layer of security.
4. Connect the Water Lines
Read the instructions and manufacturer's notes that came with your outlet box for specific instructions that pertain exclusively to your outlet box. These directions will guide you through the process of connecting the hot and cold water supply lines to the matching water valves that are in the outlet box. Depending on the type of outlet box you bought and the type of plumbing system your home has, you may need to solder more pipe pieces into place to make the supply lines connect. As with this entire process, keep in mind that this is delicate, complicated work. Especially in the case of this step, hire a professional to do this. Unless you have professional plumbing experience, it's all too easy for something to go wrong here and cause severe damage.
5. Connect the Washer Lines
Take the water inlet hoses of your washing machine and carefully screw them into their respective valves in the outlet box. As always, make sure you are connecting the hot water line to the hot water valve and the cold water line to the cold water valve. Make sure they are connected all the way, by hand first and then with pliers or a wrench second. If they are not attached securely, they will leak and you will risk mold growth and potential structural damage within the wall from the water. If your outlet box features a knockout plug in the bottom, remove it with a screwdriver and use this hole to install the drain line. If the first five feet of the drain line have no vent, one will need to be added. Do this by cutting the line and inserting a sanitary T, one end of which you will redirect into an existing vent.
6. Cover Your Outlet Box
If you cut into a finished wall to install your washing machine outlet box, take the piece of drywall you removed from below the box and cut a square the size of your outlet box from it. Using drywall screws, secure the square of drywall into place to cover the hoses in the wall. Add drywall tape around the seams for extra security. Finally, add a layer of drywall compound over the top of the tape. Let it dry and apply as many coats as you need until you have a smooth and even surface. Now, the outer outlet box's outer trim should snap or screw into place.
How to Install a Dryer Hookup
As previously noted, your dryer will have one of two power sources — gas or electric. If you have a gas dryer, this is absolutely a job for a professional. Dealing with gas means a high risk of fire or leaks, so unless you are a professional in these areas, this is not something to attempt on your own.
Similarly installing a new electrical hookup is a potentially dangerous process. Electric dryers require 240-volt outlets controlled by a set of 30- to 50-amp breakers. If this is not already in place, installing it is no task for an amateur or DIY enthusiast. Call a professional electrician to ensure the job gets done right.
How to Install a Gas Line for a Dryer
The following is a basic overview of what the process entails. This is not a complete guide intended as instructions for a personal home improvement process, but an overview of the process that you should expect.
1. Turn off the Gas
This is critical. Never work with gas lines while the gas valve is open. This is extremely dangerous. Only begin work after the gas valve is safely shut off.
.
2. Connect the Gas Line to the Dryer
For this step, flexible pipes are the best choice of material. Although steel pipes are better at preventing leaks, they render your dryer immovable. Threading tape should be used to create the joints in the flexible pipes to help prevent leaks. Connect the gas line to the dryer itself, using a wrench to tighten it as far as possible.
3. Check for Leaks
Check for leaks by applying a mixture of soap and water to the joints of the pipe. Open the gas valve and watch the soap mixture on the joints carefully. If the gas is leaking at the joints, the mixture will bubble and froth at the location of the leak. If the soap does not react, the joints are secure, and there are no leaks.
How to Install a Dryer Vent
If the house or apartment has never had a washer or dryer in it, a new dryer vent will need to be created. Here are the basic steps for completing this process.
1. Plot the Course
Based on where you plan to install the dryer, figure out the neatest course for the new dryer vent. Ideally, this course will be as short as possible and take as few turns as possible. As you map out the route, plan to use no more than 25 feet of exhaust piping, with five feet subtracted for every 90-degree turn the pipe makes and 2.5 feet for every 45-degree turn.
2. Make the Hole
Drill a small test hole in the rim joist so you can see exactly where it comes out on the outside. If you decide this is too high, too low, or too far to the side, it's still easy to adjust at this stage. Adjust your position as you see fit based on this test hole. Once you're satisfied with your position, create a hole with a 4-4.25 inch diameter. While you can use a few different tools here, one suitable option is a bimetal hole saw. When the hole is complete, place the vent cap into it. Make sure the vent cap rests firmly against the siding before attaching it and caulking all the way around it. Make sure to secure it evenly in every corner. On the inside as well, caulk all the way around the vent hole.
3. Attach the Vent
Back inside, cut your vent piping to the correct length and carefully tape every joint. Attach the first end of the vent pipe to the exhaust port in the back of the dryer and secure it in place. Once the dryer is pushed back into place against the wall, attach the remaining sections of the pipe. Put the crimped ends of the pipe into the vent hole you created in the wall and tape it neatly shut. Last, use brackets and straps to connect the vent piping safely to the wall. This way, it won’t break, come loose.
Common Washer and Dryer Questions Answered
Once you've properly and safely installed your washing machine and dryer, everything will work smoothly, right?
No matter how careful you are throughout the installation process, something always seems to come up. As a result, you might have questions related to installation, function, malfunction, or maintenance. With that in mind, here are the answers to some of the most common questions about washers and dryers.
Why Does My Washer Bounce Around During the Spin Cycle?
 Most likely, this means your washer is not on an even surface. Because it isn't level, the force and rotation of the spin cycle are enough to make it wobble back and forth.
Luckily, this is an easy fix. Lift the machines up or tip them to the side as you adjust the feet as needed. Some feet will level themselves as you lift the appliance. If not, you may need to twist them counterclockwise to loosen them and let them level themselves.
If this fails, consult the instructions that came with your machine. See if your machine requires additional feet or pads installed on the bottom to help it stay level.
How Do I Tell Which Water Hose Is Hot and Cold if They Are Not Color-Coded?
Some washers come with color-coded hoses, which makes things simple. But if your machine doesn't come equipped with these visual cues, there's no need to worry.
Place a bucket underneath one of the hoses and let the water run for a bit. You should be able to tell quite quickly if you're running hot or cold water. At this point, you may want to somehow mark the hoses for yourself, perhaps with a piece of colored tape or some other visual reminder. That way, you won't have to repeat this test again.
What Do I Do When My Dryer Doesn’t Get Warm Anymore?
 This probably means your dryer is having problems getting the correct voltage. First things first, check that the dryer is still plugged into the correct outlet. If it is, move to your circuit breaker and check that all the breakers are in the correct "on" position. If this still doesn't reveal the cause of the issue, check your fuse panel and make sure that none of them have blown.
If none of these possibilities seem to be what's causing the problem, it could be one of several other things. It could be a problem with the heating element, the dryer thermostat, or the thermal fuse. All of these are much more complicated problems and will require the attention of a professional.
Call Mr. Rooter Plumbing of Greater Syracuse for Your Laundry Plumbing Installation Needs
If you live in the greater Syracuse area, Mr. Rooter Plumbing is the only name you need to know when it comes to laundry installation. When you work with us, it doesn't matter if your house has never had a laundry machine installed in it or if you're just replacing an old appliance that broke. We know how to do both types of installations, and we'll get it right — the first time.
Washer plumbing installations aren't the only thing we do, either. We also clean drains, service sewer systems, repair frozen or leaky pipes, repair water heaters and perform many other types of plumbing maintenance. If you own a business, we also offer quick and professional plumbing services to the commercial sector. We even have an emergency hotline that's available 24/7 in case something unexpected and urgent comes up. If you have such an emergency, call us today. We never charge after-hours fees – we know that plumbing emergencies don’t always occur during normal business hours.
Request a job estimate today for your upcoming project. If you have any questions about us, laundry machine installations or anything else, don’t hesitate to contact us. We're excited to hear from you!
Sources:
https://homeguides.sfgate.com/install-washer-dryer-connections-71275.html
https://www.wikihow.com/Hook-up-a-Washer-and-Dryer
https://www.easyapplianceparts.com/Dryer+dryer-wont-heat+repair.htm
https://www.doityourself.com/stry/running-and-connecting-a-gas-line-for-your-dryer
https://www.familyhandyman.com/laundry-room/how-to-install-a-dryer-vent/
